In the first months of life, your baby’s immune system is still developing — which makes proper hygiene especially important. While cleaning is essential, sterilizing baby items like bottles, pacifiers, and pump parts adds an extra layer of protection against harmful bacteria, viruses, and germs.
If the idea of sterilizing everything feels overwhelming, don’t worry. With a few simple tools and routines, you can keep your baby’s items safe and clean — without adding extra stress to your already busy days.
Why Sterilization Matters for Babies
Sterilization goes beyond basic washing. While soap and water remove dirt and residue, sterilizing kills bacteria, fungi, and viruses that can remain on items, especially those used for feeding.
Benefits of sterilizing baby items:
- Reduces the risk of infections, especially gastrointestinal and respiratory
- Protects premature babies and newborns with weaker immune systems
- Prevents growth of bacteria in milk residue or damp environments
- Offers peace of mind for parents and caregivers
Even though most pediatricians agree that constant sterilization isn’t necessary forever, it’s especially important during the first few months.
What Baby Items Should Be Sterilized?
Not everything in your nursery needs to be sterilized, but certain high-contact and moisture-prone items should be cleaned more thoroughly.
Items that should be sterilized regularly:
- Baby bottles and nipples
- Breast pump parts (that come in contact with milk)
- Pacifiers and teething toys
- Bottle brushes (weekly)
- Sippy cup parts and straws
- Feeding spoons for infants under 6 months
Items to sterilize occasionally or when new:
- High chair trays
- Silicone plates and utensils
- Toys that baby frequently mouths
- Medicine droppers or baby thermometers
- New items before first use
After 3–6 months, sterilizing can become less frequent if you follow proper cleaning routines — unless your baby is premature or has specific health concerns.
How Often Should You Sterilize?
It depends on your baby’s age and the item in question.
General guidelines:
- Newborn to 3 months: Sterilize bottles, nipples, pacifiers, and pump parts daily
- 3–6 months: Continue daily or reduce to every few days depending on baby’s health
- 6+ months: Sterilize weekly or when items are dropped in unsanitary places
You should also sterilize items:
- After purchasing (before first use)
- If dropped on the floor or outdoors
- After illness (fever, vomiting, infection)
When in doubt, a quick sterilization cycle can give you peace of mind.
Methods for Sterilizing Baby Items
There are several safe and effective ways to sterilize baby items — from boiling water to electric sterilizers. Choose what works best for your routine, space, and budget.
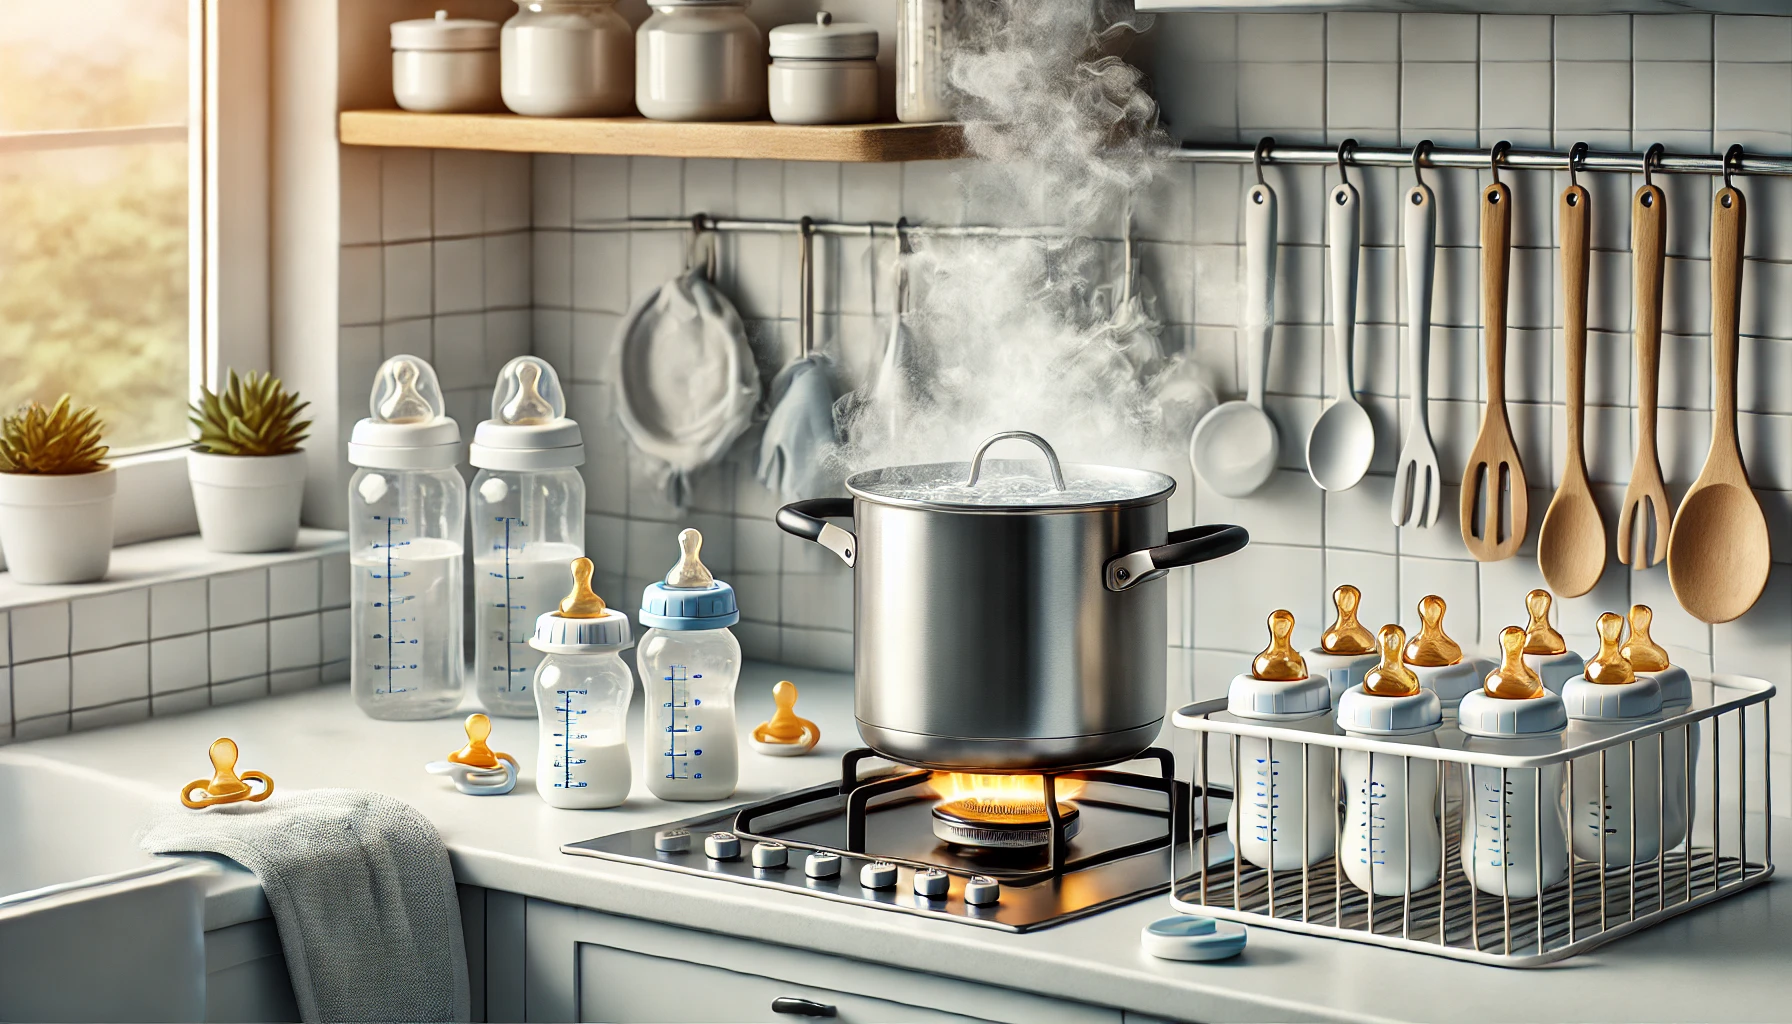
1. Boiling
One of the most common and affordable methods — and all you need is water and a pot.
How to do it:
- Wash all items with soap and hot water
- Fill a large pot with enough water to fully submerge everything
- Bring water to a rolling boil
- Boil items for 5–10 minutes
- Use clean tongs to remove items and place them on a clean, dry towel to air-dry
Note: Some items (like certain pacifiers or plastic parts) may warp in high heat — always check the manufacturer’s instructions.
2. Steam Sterilizers
Steam sterilizers use high-temperature steam to kill germs without chemicals. They’re fast, effective, and designed for baby gear.
Pros:
- Sterilize multiple items at once
- No need to monitor the process
- Can include drying function
Usage:
- Fill the base with water
- Load bottles or parts upside down
- Turn on and wait for the cycle to complete (usually 5–15 minutes)
They’re ideal for parents who sterilize frequently or want a hands-off solution.
3. Microwave Steam Bags or Sterilizers
Microwave sterilizers are convenient, portable, and great for travel or small spaces.
Steam bags:
- Add water and baby items to a microwave-safe sterilizing bag
- Heat according to package instructions (usually 3–5 minutes)
- Let cool before removing items
Microwave sterilizer units:
- Fill base with water
- Place items inside with openings facing down
- Microwave on high per product directions
Always let items cool fully before handling.
4. UV Sterilizers
UV (ultraviolet) sterilizers use light to kill bacteria and viruses. They’re chemical-free and often double as storage units.
Pros:
- Safe for electronics (pacifier clips, teethers with batteries)
- No heat or water required
- Modern and efficient, though more expensive
Simply place items inside, close the lid, and start the cycle (typically 5–10 minutes). Great for tech-savvy parents or high-volume sterilizing.
5. Cold Water Sterilization (Chemical)
This method uses sterilizing tablets or liquid solutions (like Milton) dissolved in cold water.
Steps:
- Dissolve the sterilizing solution in a large container
- Submerge clean items fully
- Soak for at least 30 minutes
- Items remain sterile for up to 24 hours in the same solution
This is ideal when no heat or electricity is available — but make sure to rinse items afterward if needed.
Drying and Storing Sterilized Items
Sterilizing is only half the process — keeping items clean afterward matters too.
Best practices:
- Let items air-dry on a clean, dry towel or drying rack
- Avoid wiping with dish towels, which can introduce new bacteria
- Store in closed, clean containers or sterilizer units with drying features
- Use items soon after sterilizing if not sealed — they don’t stay sterile forever
Some parents choose to sterilize daily and store everything in zippered bags, drawers, or designated clean bins.
Do You Need to Sterilize Every Time?
Not always. If you wash items thoroughly with hot, soapy water, rinse well, and allow to air dry, that may be enough for older babies (6+ months) with strong immune systems.
When washing is enough:
- After every use for bottles and pacifiers
- For babies over 6 months who are eating solids
- If your pediatrician gives the go-ahead
But for newborns, premature babies, or during illness, sterilization adds an important layer of protection.
Safety Tips to Keep in Mind
- Always wash items before sterilizing — dirt and milk residue can protect bacteria from heat
- Read product labels to ensure items are heat-safe and BPA-free
- Replace worn, cracked, or damaged bottle nipples and pacifiers
- Keep all sterilizing equipment clean and dry between uses
- Never mix baby utensils with kitchen sponges or cloths used for raw foods
A little consistency in your cleaning routine goes a long way.
Final Thoughts
Sterilizing baby items doesn’t have to be stressful. With the right method and a few simple tools, you can keep your baby’s feeding gear clean, safe, and ready for everyday use. Whether you prefer boiling water, a countertop sterilizer, or quick microwave bags, choose what fits your lifestyle — and know that you’re doing a great job.
In the end, sterilizing isn’t about being perfect. It’s about creating a healthy, supportive space for your baby to grow — one bottle, pacifier, and spoon at a time.
You’ve got this — and your baby’s health is in excellent hands.

